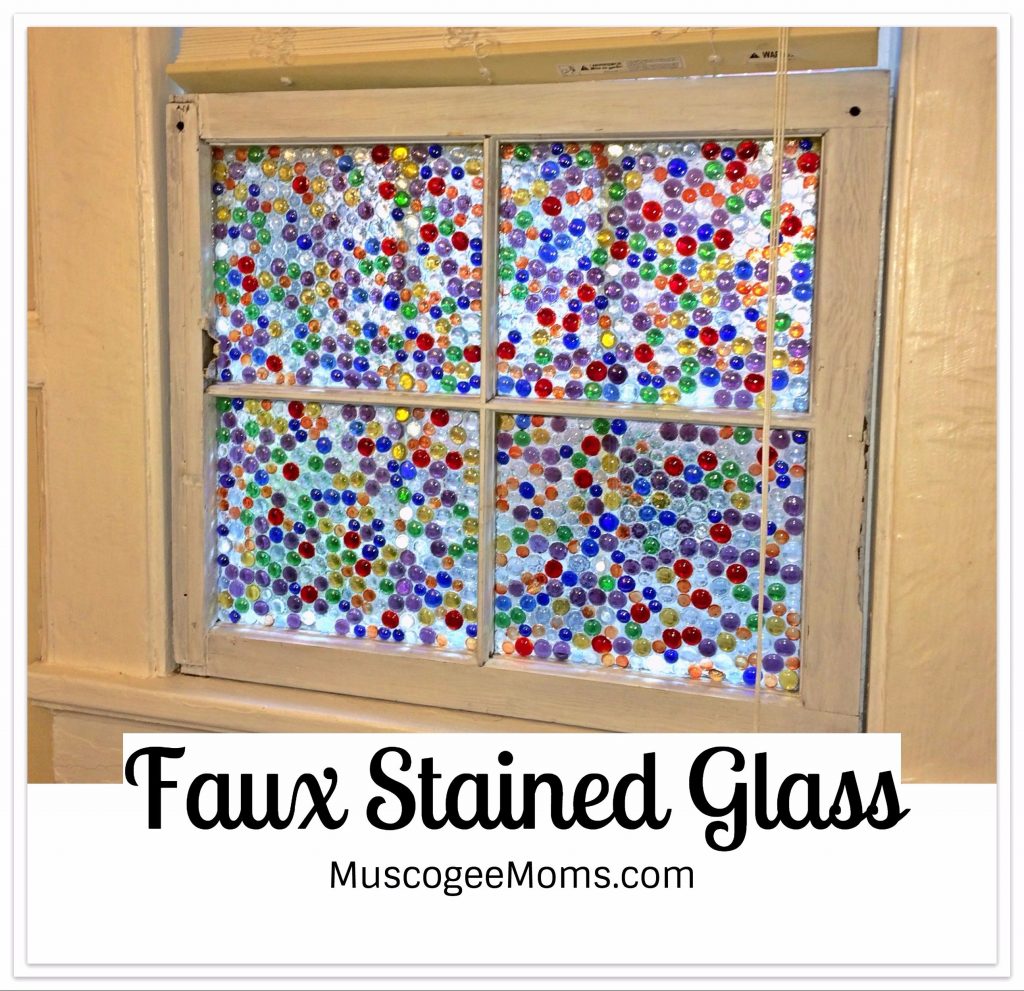
Faux Stained Glass Window:
My misadventures with a DIY project
By Charlotte Bowman
Several years ago I had the pleasure of meeting Laura Auer — an Army wife and mother of four. Laura was the host of Happy Auer — a television show about food, fun, and fashion. You can watch the episodes on YouTube.
Laura’s sunroom on Fort Benning was filled with faux stained glass windows. The sunlight filtering through the colored panes brightened the look of the room. After watching her demonstrate how to make one, I decided to make one too. The process looked easy. What could possibly go wrong?
I’ve said before that I’m not a DIY enthusiast. I get easily sidetracked and sometimes forget to follow every direction.
That weekend I purchased a small four-pane window frame from Reeves Wrecking. The remaining supplies I purchased from a local craft store.
After putting my children to bed, I cleared off my kitchen counter and got to work. I spread colorful glass beads inside each pane, mixed the resin, and it over the top. Then I carefully carried the window pane outside and set it on our back porch to dry. A quick clean up, then off to bed.
Bright and early the next morning I hurried outside to inspect my DIY project. I couldn’t wait to admire the sunlight filtering through it.
I reached down to pick up the window, but it didn’t move.
Wait… What?
I tried again. Still, no movement.
A few moments later my husband poked his head out the back door and wanted to know why our countertop was slick as glass. I started laughing and couldn’t stop.
Apparently I didn’t do a very good job cleaning up the night before. The resin had seeped through the edges of the window panes and dripped onto our kitchen counter. The window continued to seep overnight until it cured. Now my window was firmly bonded to the back porch. My husband had to pry it loose with a crowbar!
Needless to say, the project was an epic fail.
Several months later, I decided to try again. My second attempt was more successful — thanks to my long-suffering husband. As soon as he saw knew my plans, he pulled out a caulk gun and sealed the edges of the window panes before I began.
I’m quite proud of the results. And we have a funny story to share with friends over dinner.
Here are the directions if you’d like to try this project at home. Just be sure you follow them carefully.
Materials Needed:
- Wooden window frame with glass intact
- Colorful beads, pebbles or shards of colored glass
- EnviroTex Lite pour-on High Gloss Finish (resin)
- Large disposable bowl
- Wooden paint stick
- Old newspaper
- Rubbing alcohol and disposable gloves
Directions:
1. Assemble your items.
Collect your items and lay them out on a flat surface. Put some newspaper under the window frame to catch any spills.
I purchased my window frames from Reeves Wrecking in Columbus. They have a ton of old windows to choose from. For a smaller project, you can use a picture frame, so long as the glass and frame are intact.
2. Prep your Window
Clean, paint (or stain) and seal your window. Then calk the edges of the window panes to prevent any leakage.
Tip: Trust me! Don’t skip this step or you’ll have a huge mess on your hands.
3. Arrange the glass beads inside the frame
Arrange the colored glass beads in any pattern you like. Be creative. I used colored glass beads, but you can embed almost any object you want in clear liquid plastic. The beads will look like they are floating in the resin.
4. Prepare the resin
Next, mix the resin in a bowl according to the package directions. One box is equal to 50 coats of varnish. You will use the entire box for this craft. Be sure to mix the resin well, scraping your sides and your mixing utensil as you go.
Tip: Use a bowl that you can discard when the craft is finished.
5. Pour the resin over the glass
Carefully pour all of the resin over the top of your picture. Use a wooden spoon to spread the resin evenly over the entire surface.
Tip: Be sure to have some rubbing alcohol nearby in case any resin gets on your hands or your work surface!
6. Let your window dry
Allow the frame to dry for 24 hours on a flat surface. I put my frames outside on our back porch. ArtResin reaches 95% of its full cure within 24 hours, and 100% of its cure within 72 hours. After the 24 hour mark, your window can be moved from its curing position and hung on a wall or window.
Tip: The cure time is affected by temperature. Warmer temps facilitate curing and colder temps retard curing. It the resin is sticky after 24 hours, it didn’t cure properly. Re-read the instructions on the box.
7. Add hooks for hanging (optional)
Laura used a drill bit to insert hooks into the top of her windows frame so she could suspend them from her windows. My husband used his drill bit to mount mine directly to the window jamb. Trust me. It’s not going anywhere.
Enjoy!


